수업
모바일프로그래밍 기초 - Android studio 활용 <간단한 주사위 게임 앱 만들기>
eunslog
2023. 3. 14. 10:49
3/13 모바일프로그래밍 수업
언어는 코틀린을 사용하였다.
<간단한 주사위 굴리기 게임 만들기>
1. Android Studio에서 프로젝트 하나를 생성한다.
2. res > drawable 폴더에 주사위 1~6까지 이미지를 넣어준다. (댓글 달아주시면 공유합니다.)

3. activity_main.xml에서 Common>ImageView와 Buttons>Button 에서 OK버튼 하나를 추가해준다.

(크기 설정)
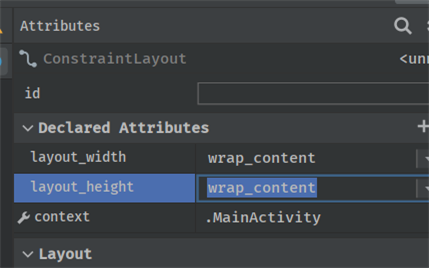
wrap_content : 원래 크기대로 설정.
math_parent: 화면에 꽉 차게 맞춤.
숫자로 설정도 가능하다.
4. 코드
MainActivity class
package com.example.myhello

import androidx.appcompat.app.AppCompatActivity
import android.os.Bundle
import android.widget.Button
import android.widget.ImageView
import android.widget.TextView
import android.widget.Toast

class MainActivity : AppCompatActivity() {
    override fun onCreate(savedInstanceState: Bundle?) {
        super.onCreate(savedInstanceState)
        setContentView(R.layout.activity_main)

        val btnOK = findViewById<Button>(R.id.btnOK) // 오른쪽에 파라미터 R.id.btnOK는 integer 객체이고 val btnOK는 view 객체이다.
        // 이렇게도 사용가능함.
        // val btnOK: Button = findViewById(R.id.btnOK)
        // val txtDice = findViewById<TextView>(R.id.txtValue) -> 밑에 rollDice()함수로 옮김 // 처음 사용될 때는 val라는 키워드 꼭 써줘야함. id를 파라미터로 넣어주고, 리턴되는 값을 class객체에 넣어줌.

        btnOK.setOnClickListener{rollDice()}
    }


    private fun rollDice()
    {
        val randomInt = (1..6).random() //Random().nextInt(6)+1
        //val resultText: TextView = findViewById(R.id.result_text)
        val txtDice = findViewById<ImageView>(R.id.imgDice)
        //txtDice.text = randomInt.toString() // 자바와 다르게 setText() 이런식이 아니라 속성명만 써도 됨.

        val drawableResource =
            when(randomInt) {
                1 -> R.drawable.dice_1
                2 -> R.drawable.dice_2
                3 -> R.drawable.dice_3
                4 -> R.drawable.dice_4
                5 -> R.drawable.dice_5
                6 -> R.drawable.dice_6
                else -> R.drawable.dice_5 // 만약 1~6 아닌 다른 값이 나올 때 처리
            }

        txtDice.setImageResource(drawableResource)

/*        val luckyNumber = 4
        var mess = ""
        when(randomInt)
        {
            luckyNumber -> mess = "You won!"
            1 -> mess = "So sorry! Rolled a 1."
            2 -> mess = "Sad!! Rolled a 2."
            3 -> mess = "No! Rolled a 3."
            5 -> mess = "Don't cry! Rolled a 5."
            6 -> mess = "Oh! Rolled a 6."
        }
        Toast.makeText(this, mess, Toast.LENGTH_SHORT).show()*/
    }
}
밑에 주석 부분은 이미지 없이 1~6까지 랜덤숫자가 나타나도록 하는 코드이다.
activity_main.xml
<?xml version="1.0" encoding="utf-8"?>
<androidx.constraintlayout.widget.ConstraintLayout
    xmlns:android="http://schemas.android.com/apk/res/android"
    xmlns:app="http://schemas.android.com/apk/res-auto"
    xmlns:tools="http://schemas.android.com/tools"
    android:layout_width="match_parent"
    android:layout_height="match_parent"
    tools:context=".MainActivity">

    <ImageView
        android:id="@+id/imgDice"
        android:layout_width="120dp"
        android:layout_height="120dp"
        android:layout_marginTop="176dp"

        android:textColor="#F00909"
        android:textSize="60sp"
        app:layout_constraintEnd_toEndOf="parent"
        app:layout_constraintHorizontal_bias="0.498"
        app:layout_constraintStart_toStartOf="parent"
        app:layout_constraintTop_toTopOf="parent" />

    <Button
        android:id="@+id/btnOK"
        android:layout_width="wrap_content"
        android:layout_height="wrap_content"
        android:layout_marginTop="156dp"
        android:text="OK"
        app:layout_constraintEnd_toEndOf="parent"
        app:layout_constraintHorizontal_bias="0.498"
        app:layout_constraintStart_toStartOf="parent"
        app:layout_constraintTop_toBottomOf="@+id/imgDice" />
</androidx.constraintlayout.widget.ConstraintLayout>
xmlns는 xml namespace, 이름 공간이라는 뜻이다.
주사위 굴러가게 하는 애니메이션도 가능하다.
나중에 공부해봐야겠다.
결과 화면
